Inventory Management
Feature Overview
SellingPilot (hereinafter referred to as SP) provides convenient inventory management, supporting multi-platform inventory synchronization and real-time updates to avoid overselling and stockouts. The system enables unified management of multiple warehouses and stores, improving inventory turnover rate and facilitating efficient operations.
How to Use Inventory Management
There are two scenarios for managing inventory in the SP system:
-
Using SP for inventory management: Users add warehouses in SP, perform relevant inventory management and maintenance, and synchronize them to different channels and stores in real time.
-
Inventory maintenance without warehouses: Virtual warehouse inventory, where users manually maintain and modify in SP without the need to add warehouses.
Before maintaining inventory, please complete the store authorization first. StoreIntegration,After successful authorization, SP will automatically import products. Then you can start setting up inventory management.
Using SP for inventory management
Step 1: Add a warehouse
How to add a Self-owned Warehouse?
Step 2: Warehouse product matching
After adding the warehouse, it is necessary to complete the matching relationship between the warehouse products and the products in the SP system.
Self-operated warehouse product matching
3PL warehouse product matching
Platform warehouse product matching (taking the SBN warehouse as an example here)
Note: Products imported into the product master list are deduplicated by SKU#. If products imported from different stores are the same but have different SKU#s, they will be displayed repeatedly in the product master list. Users can organize the content of the product master list by modifying the SP SKU in the listing.
How to delete duplicate SKUs in the product master list
If a SKU is sold in different stores simultaneously but appears multiple times in the product master list, this will affect warehouse matching and users' data viewing. Please make modifications according to the following steps:
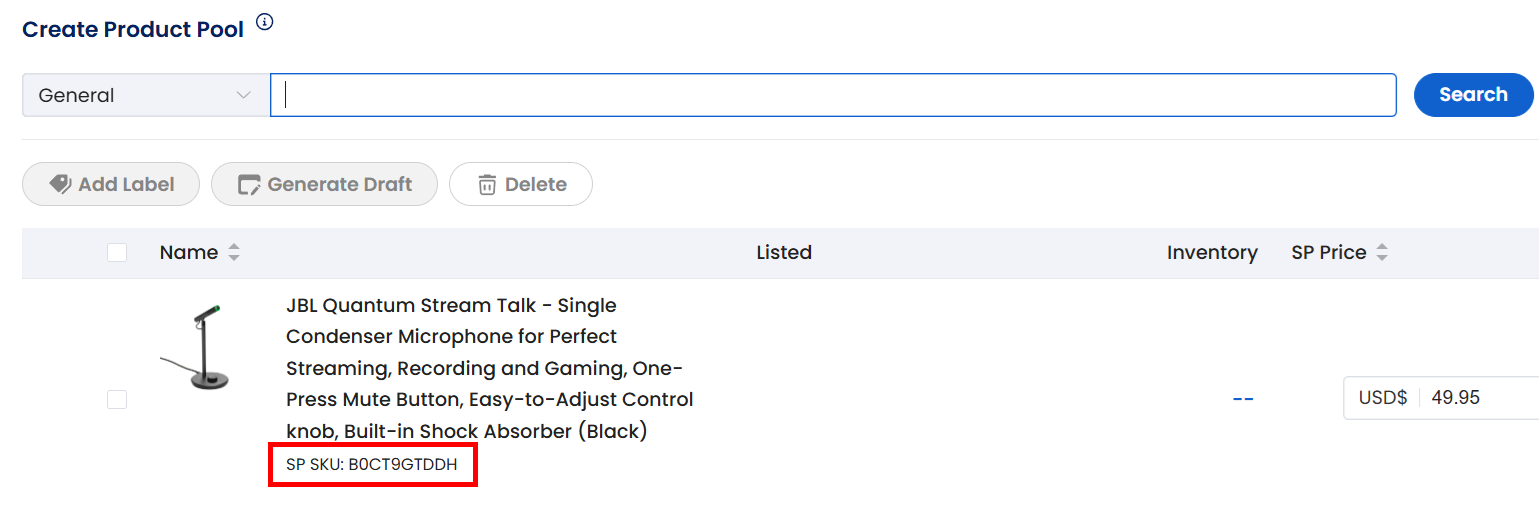
Identify the SKU to be retained: In the product master list, determine the product that needs to be retained, and then copy its SP SKU.
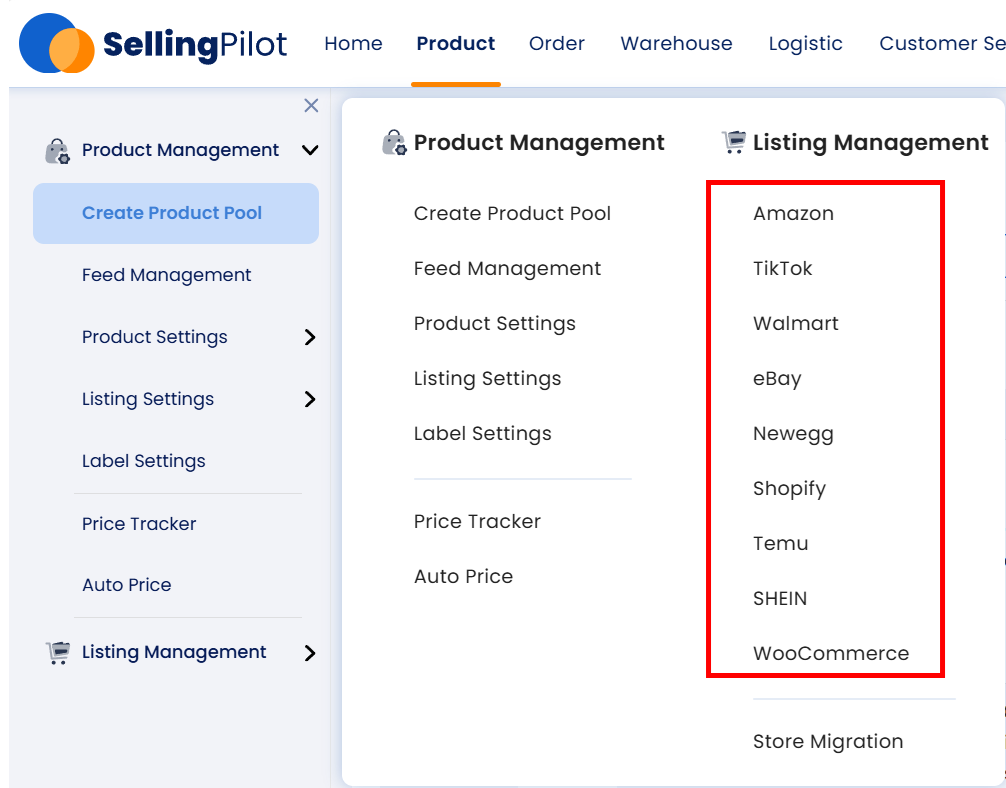
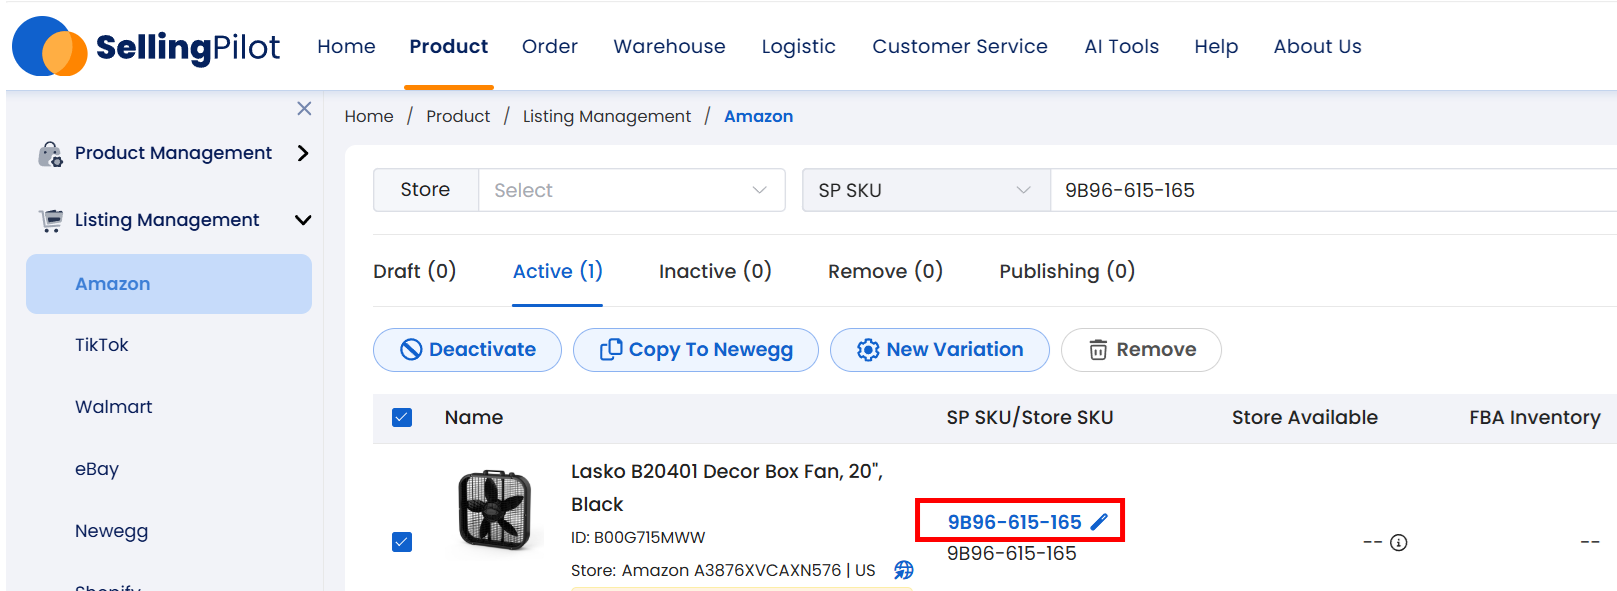
Go to the channel list: Find the product in the listing list. If its SP SKU is inconsistent with the retained one, click to modify it.
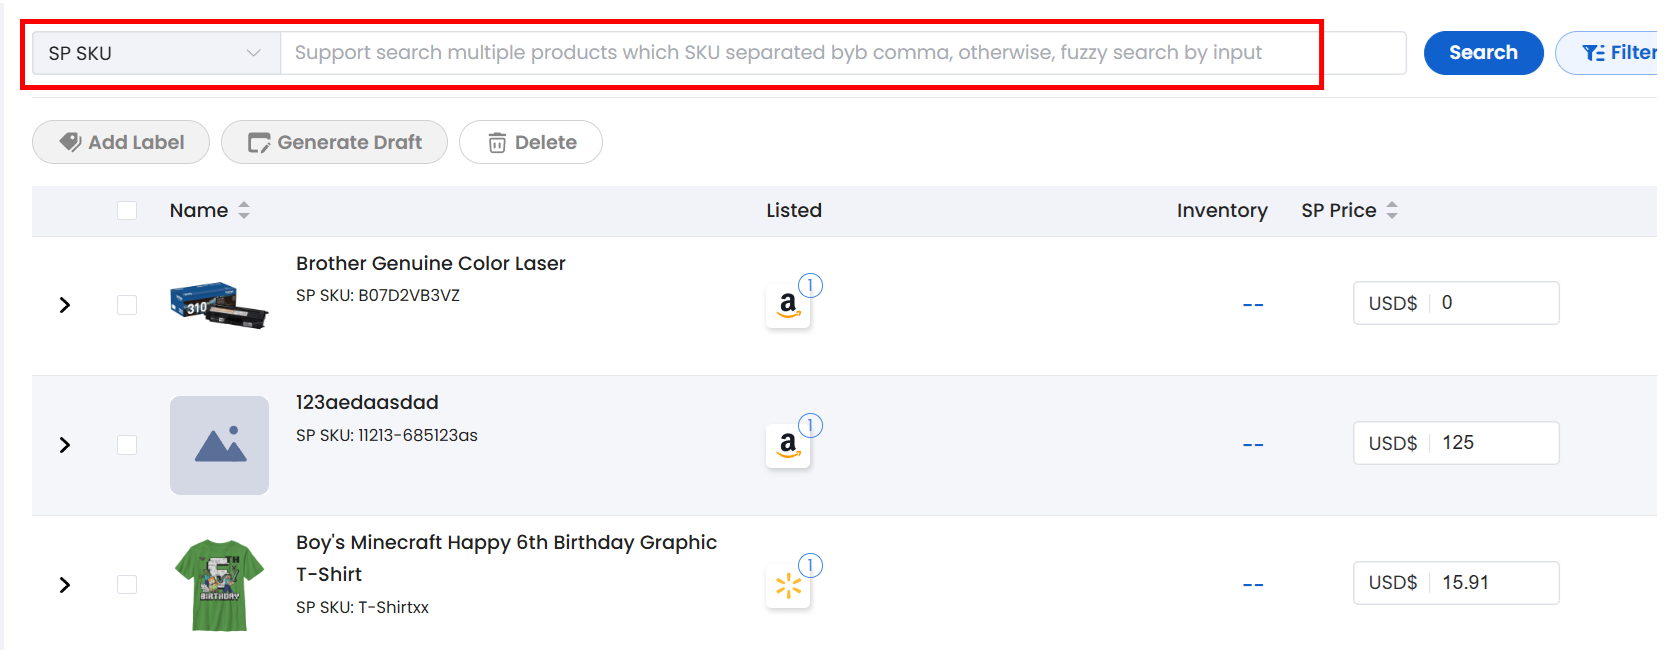
Return to the product pool: When a product is not bound to any channel, users can delete the SKU to organize their list.
Step 3: Set up warehouse synchronization
After all the above settings are completed, users need to match the warehouses set in SP with the warehouses in the channel backend and enable inventory synchronization. Then, real-time synchronization of inventory across various channels will be realized.
Click Warehouse > Inventory > Inventory Sync. Users can set the synchronization status and synchronization rules.
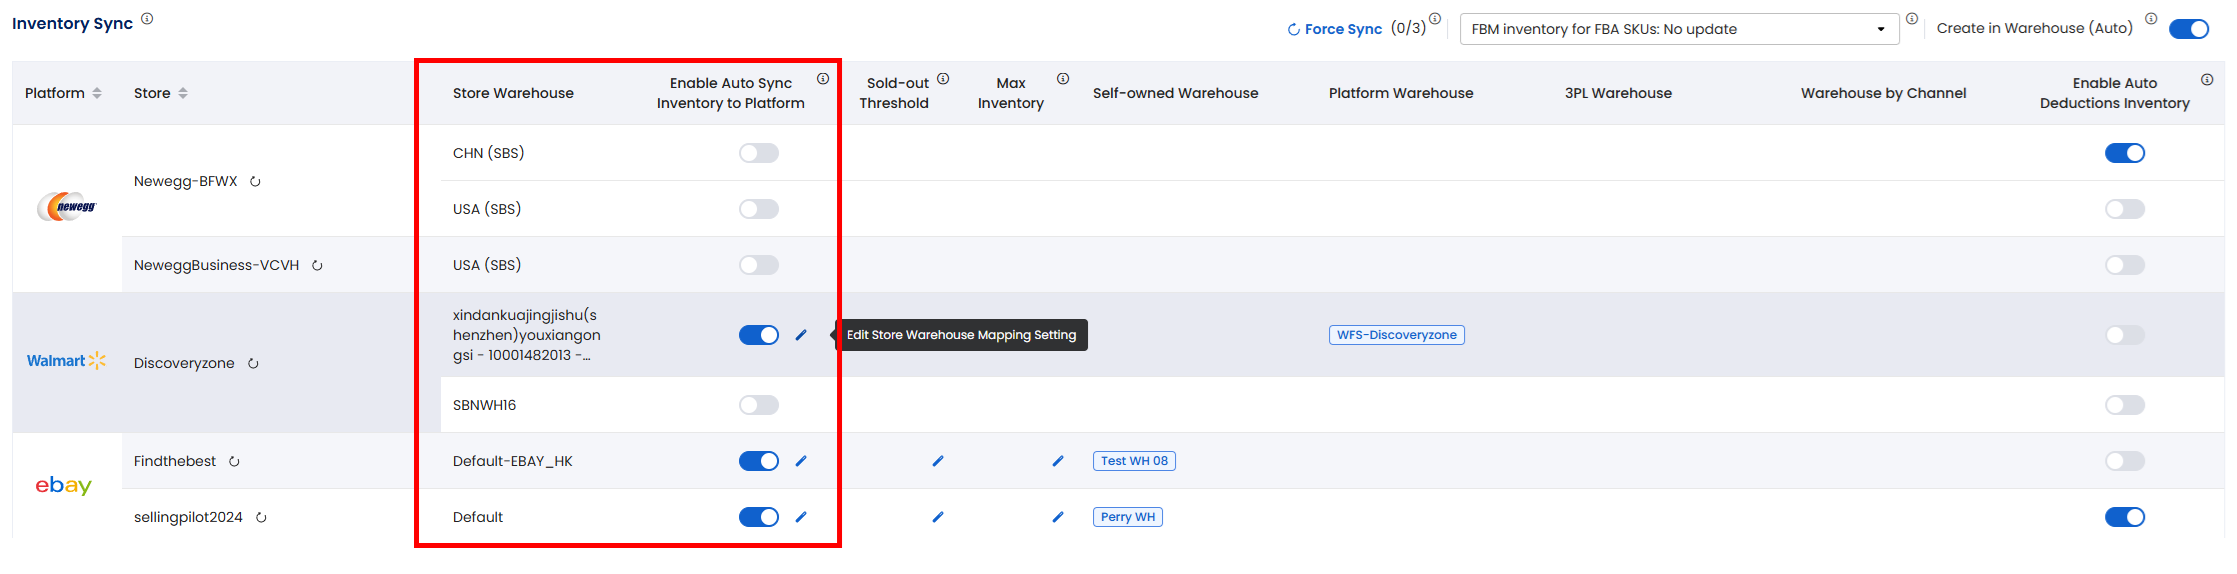
Description of Inventory Sync List Fields
| Field | Description | Remarks |
|---|---|---|
| Channel | The channel where the authorized store is located | None |
| Store | Stores of various channels | If the warehouse is not synchronized, click the refresh button next to the store |
| Store Warehouse | Self-delivery warehouse set by the user in the backend of the store's channel | Set in the channel backend, SP only synchronizes. If not synchronized, please click the refresh button after the store |
| Inventory Sync | After enabling, SP automatically syncs sellable stock from matched source warehouses to this store warehouse by the rules. Click Configure (pencil) to set inventory sources, special sync rules, and SKU scope | Shared inventory source rows cannot enable sync; decide separately whether to use Auto Deduct |
| Sold-out Threshold | When actual sellable stock is less than or equal to this value, channel inventory is set to 0 For example, if actual stock is 10 and this is 5, the channel quantity becomes 0 |
Edit in Configure > Special sync rules |
| Max Inventory | When actual sellable stock is greater than this value, channel inventory is capped at this value For example, if actual stock is 10 and this is 5, the channel quantity becomes 5 |
0 means out of stock; edit in Configure |
| Ratio | Percentage of sellable stock pushed to the channel; default 100% | Edit in Configure > Special sync rules |
| Inventory sources | Self-owned, platform, 3PL, or shared inventory sources matched to this store warehouse | Multiple warehouses can be selected in Configure |
| Auto Deduct | After an order from this store that matches this warehouse passes validation, deduct stock from the corresponding warehouse | Independent from Inventory Sync. Failed deductions normally go to Pending; with Reserve even if stock is short enabled at the page header, Auto Shipping Rules can still reserve a short warehouse (quantity may go negative) and sync listing quantity to 0 |
Inventory maintenance without warehouses
In this scenario, users do not add any warehouses in the SP system and manually maintain the product inventory of each channel store entirely by themselves.
Manually update inventory across various channels
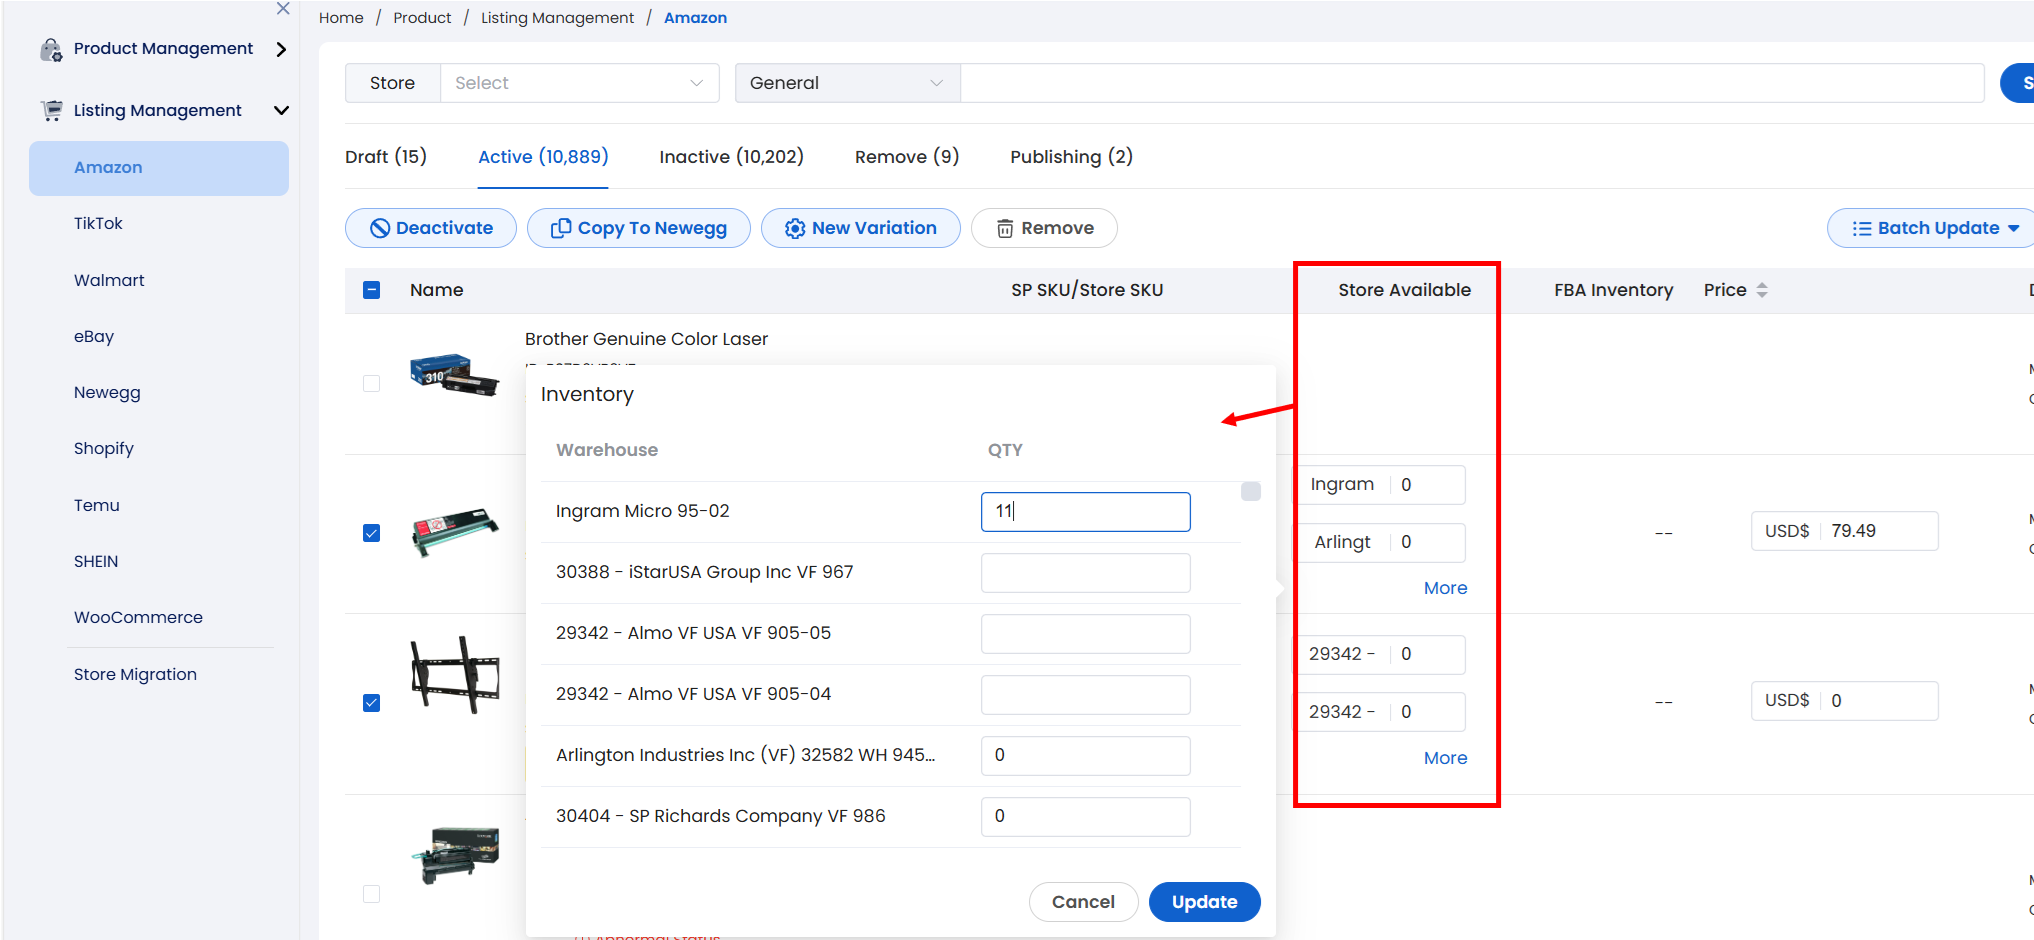
Click Products > Listing Management, select the channel for which you need to modify the inventory, then locate the specific listing (you can search for the listing using the filtering criteria above), click on the inventory to make modifications, and then save. The system will synchronize the changes back to the channel.
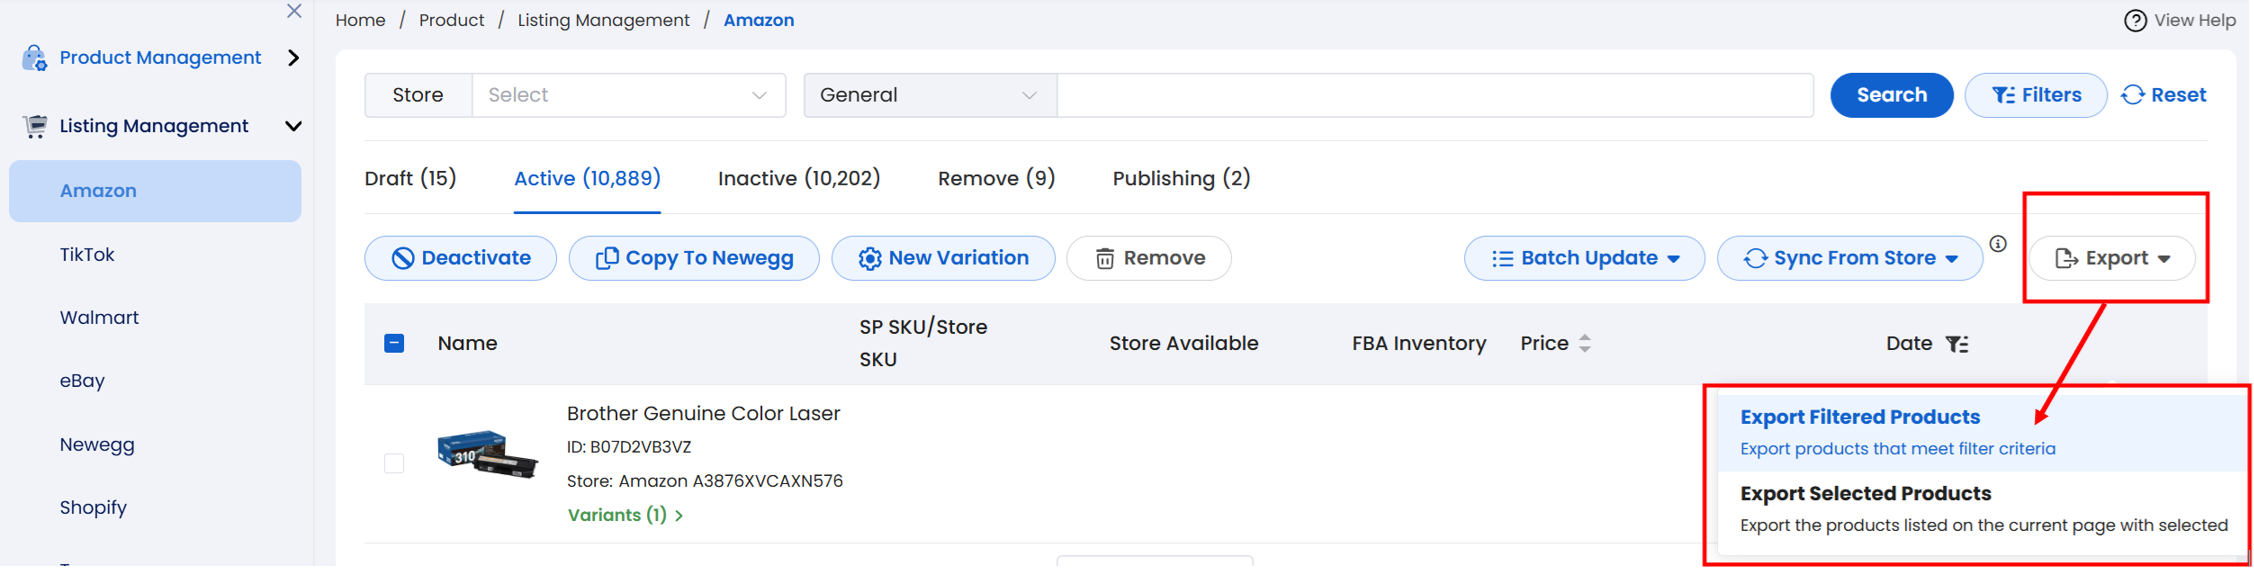
Users can also use Excel to modify inventory in batches. Since information needs to be filled in, it is recommended that users first use the Export function, then keep the listings that need to be modified in the spreadsheet, then make modifications to the inventory of each warehouse, and finally upload the spreadsheet in Batch Update > Update Inventory.
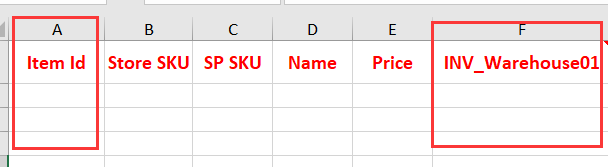
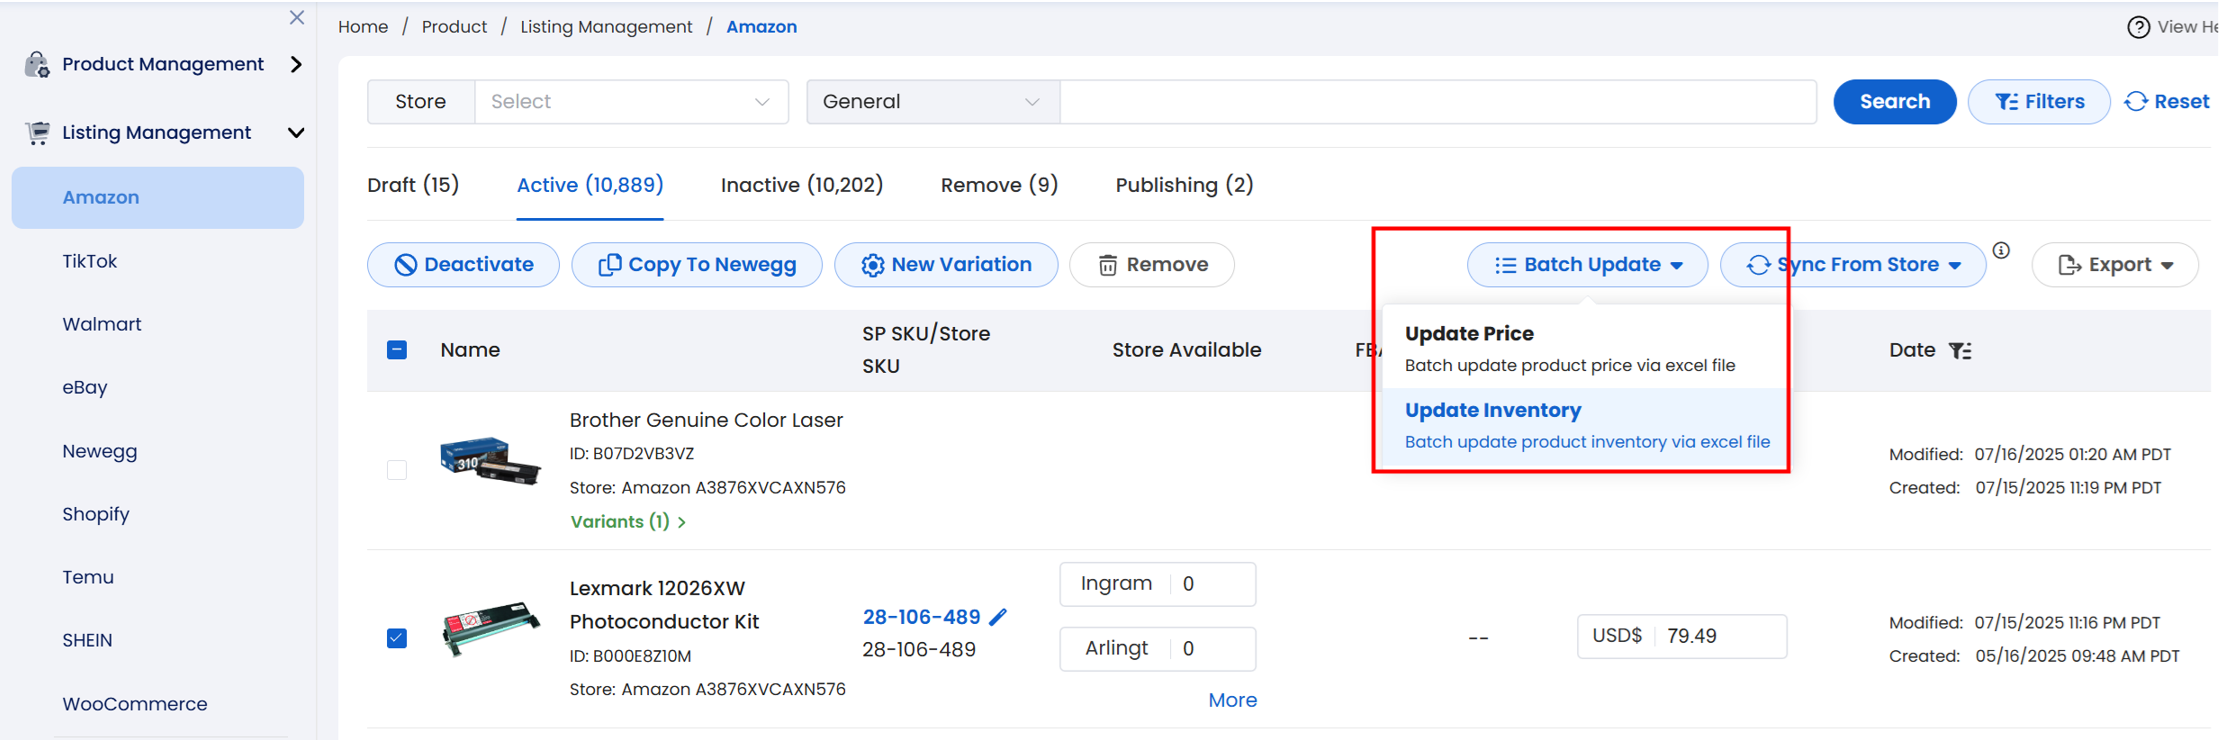
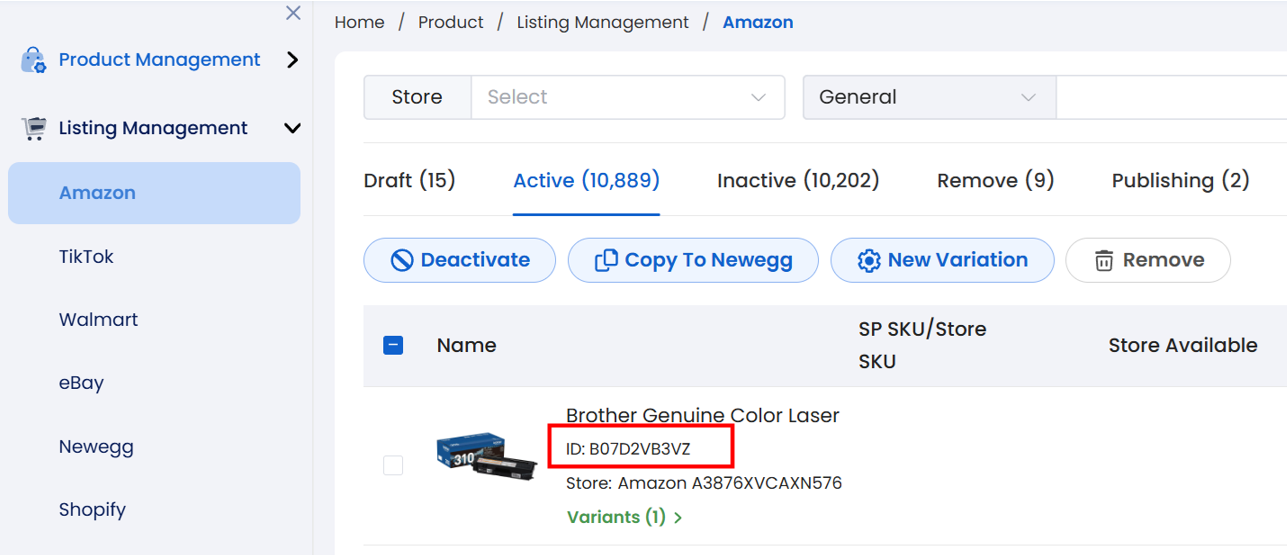
Note: Item ID and inventory are required fields, and the product ID can be found in the list.
Automatically share channel warehouse inventory
Take the store warehouse of a certain channel as the inventory source, and all inventory that matches this warehouse will be automatically synchronized. For example, if a user needs to set the SBNWH16 warehouse of a Walmart store as the source warehouse and share its inventory with Newegg and Amazon stores at the same time, the following are the operation steps:
Step 1: Confirm that the same SKU across various stores is the same SP SKU.
To share inventory, you first need to confirm that, among the listings in each store, the same product is bound to the same SP SKU. The SP SKU is the basis for the association between listings.
Step 2: Open the sharing settings
On Inventory Sync, set the source store warehouse as a shared inventory source, confirm the dialog, and click Confirm.
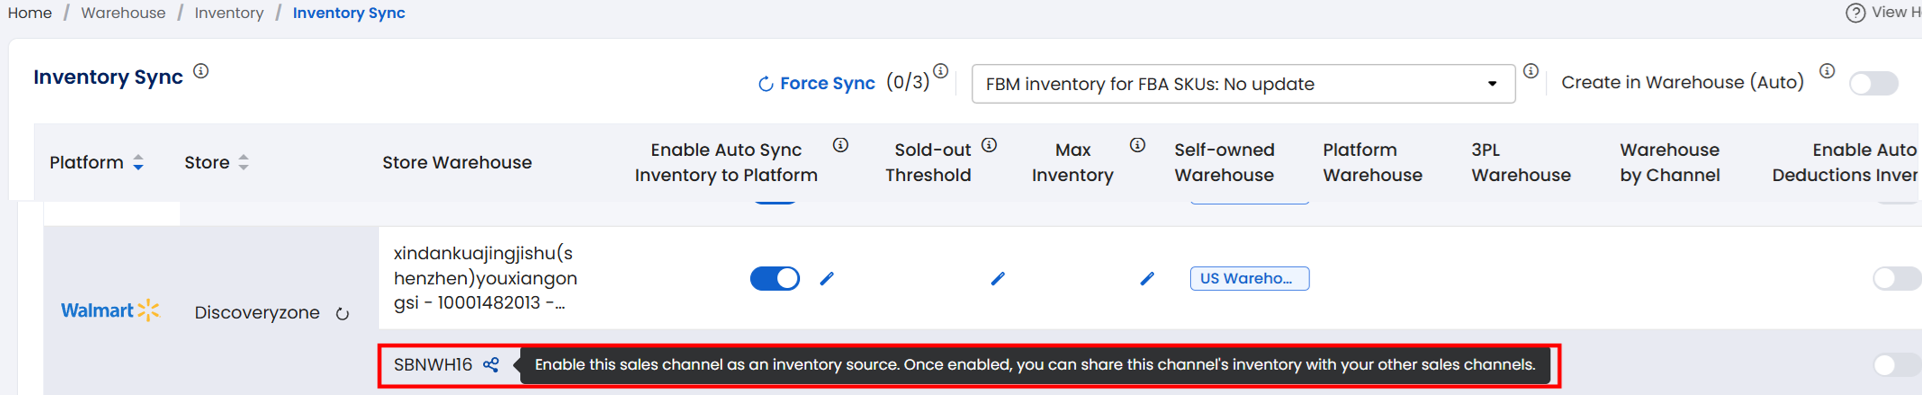
Step 3: Enable Inventory Sync and select the shared source
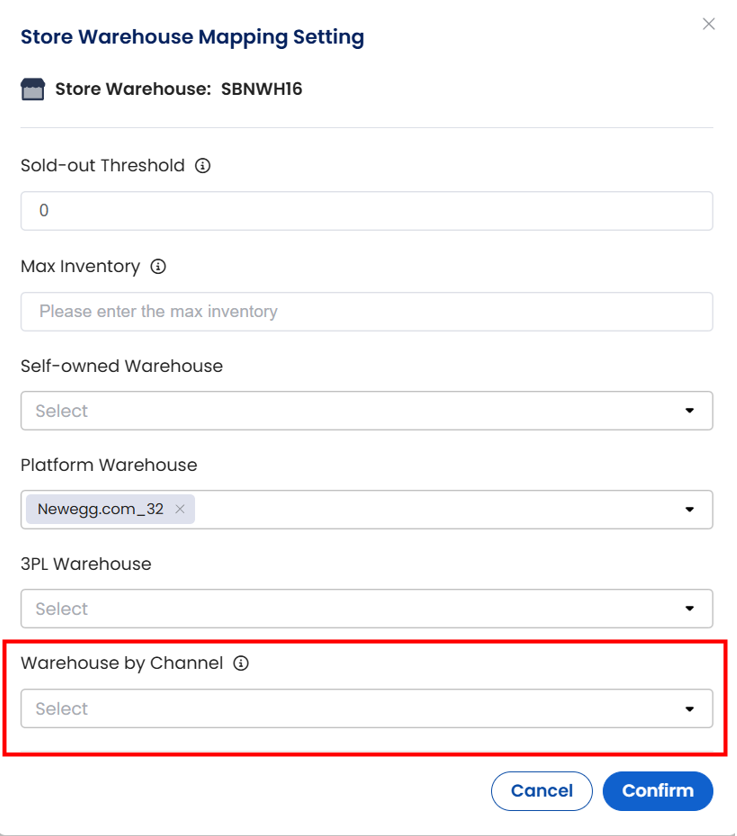
Locate the store warehouse that should use the shared stock, turn on Inventory Sync, click Configure, then select the warehouse you set as a shared source in Step 2 under Inventory sources.
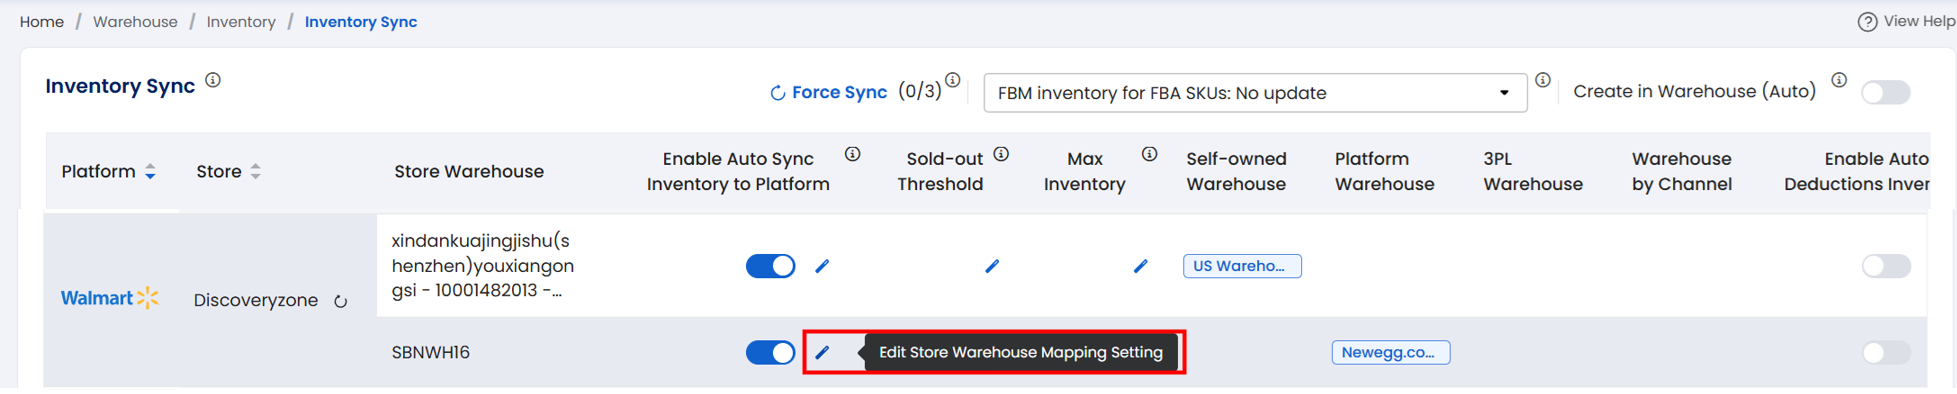
Once this setup is completed, users only need to modify the inventory in the Walmart Listing, and it will be synchronized to Newegg and Amazon automatically.